If you’re wondering how to replace an air handler filter, you’re in the right place.
Replacing your air handler filter is a crucial task that can improve air quality, enhance system efficiency, and prolong the lifespan of your HVAC system.
In this guide, we will explore the step-by-step process to make it easier for you.
What Tools Do You Need to Replace an Air Handler Filter?
Before you dive into the process, it’s essential to gather the right tools. Thankfully, replacing an air handler filter doesn’t require complicated equipment. Here’s what you’ll need:
- New air handler filter (check your unit’s specifications for size)
- Screwdriver (if your air handler requires opening)
- Safety glasses (to protect your eyes from dust)
- Vacuum cleaner (optional, for cleaning surrounding areas)
Where is the Air Handler Filter Located?
Knowing where to find the air handler filter is the first step in learning how to replace an air handler filter.
Air handler filters are typically located:
- Inside the air handler unit
- Within the return air duct
- Near the furnace or air conditioning system
Check your user manual for precise locations, as this can vary based on the model and make of your HVAC system.
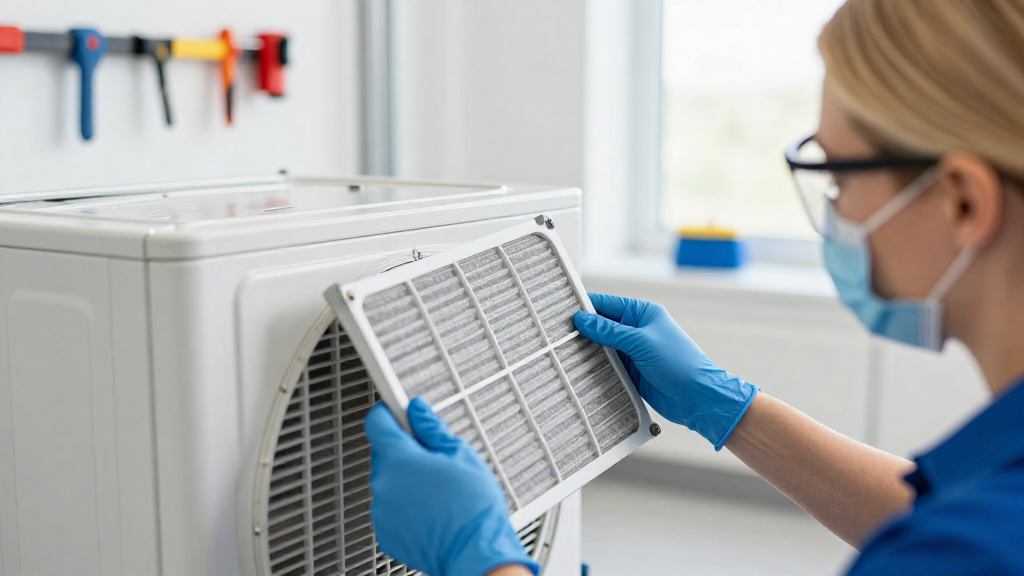
How Do You Remove the Old Air Handler Filter?
Once you’ve located the filter, follow these steps to remove it:
- Turn Off the System: Always start by turning off your HVAC system to avoid any accidents.
- Open the Access Panel: Use your screwdriver (if needed) to open the panel where the air handler filter is housed.
- Take Out the Old Filter: Gently pull the old filter out. Be cautious; it may be dusty or dirty.
- Check for Debris: Once out, inspect the area for dirt or debris that might need cleaning.
How to Replace an Air Handler Filter with a New One?
After you’ve safely removed the old filter, it’s time to install the new one. Here’s how:
- Identify the Correct Orientation: Before placing the new filter, identify the airflow direction. Most filters will have arrows indicating how air should flow.
- Insert the New Filter: Slide the new filter into place firmly.
- Ensure a Tight Fit: Make sure it’s snugly fit to prevent unfiltered air from circulating.
- Close the Access Panel: Replace the panel securely and use the screwdriver if needed.
How Often Should You Replace an Air Handler Filter?
To maintain optimal performance, it’s vital to understand how often to replace an air handler filter. As a general guideline:
- Every 1 to 3 months for standard use
- Every month if you have pets or allergies
- Every 6 to 12 months for high-efficiency filters
Regular replacements will help keep your air clean and your system running efficiently.
What Are the Signs You Need to Replace Your Air Handler Filter?
Being proactive can save you from issues down the line. Here are signs that indicate you may need to replace the air handler filter sooner rather than later:
- Reduced airflow from vents
- Increased energy bills without explanation
- Dust accumulation around vents and in your home
- Strange odors coming from your HVAC system
- Visible dirt or discoloration on the filter
If you notice any of these signs, it’s time to replace your air handler filter.
Can You Use a Washable Air Handler Filter?
Yes, some people prefer washable filters for their longevity and reusability. Here’s what you need to know about using washable air handler filters:
- Eco-Friendly: They reduce waste as you can clean and reuse them.
- Cost-Effective: Although the initial price may be higher, the long-term savings are significant.
- Cleaning Process: Simply remove, wash with water, and let dry before reinstalling.
However, bear in mind that while washable filters can be convenient, they may not capture as much particulate matter as disposable ones. Always check your model specifications before making a switch.
What Is the Impact of a Clogged Air Handler Filter?
Neglecting to replace an air handler filter can lead to several problems, including:
- Reduced Efficiency: A clogged filter forces your HVAC system to work harder, which can impact efficiency and lead to higher energy bills.
- Poor Air Quality: Dirty filters recirculate dust, allergens, and pollutants in your home.
- Increased Wear and Tear: The additional strain on your system can lead to breakdowns and expensive repairs.
Regularly replacing the air handler filter is a simple way to avoid these issues.
Conclusion: Mastering How to Replace an Air Handler Filter
Knowing how to replace an air handler filter is a straightforward task that pays dividends in terms of air quality and HVAC system longevity.
By following these simple steps, you can easily take control of your home’s environment and ensure your air conditioning and heating systems work efficiently.
- Gather your tools.
- Locate and remove the old filter.
- Install the new filter.
- Keep track of replacement frequency.
Taking this small step makes a significant impact.
For more information on proper HVAC maintenance and other DIY home tips, don’t forget to check back for more articles!
By mastering how to replace an air handler filter easily, you’re not just maintaining your HVAC system; you’re enhancing the comfort of your home.