Understanding how to winterize a mini split system is essential for maintaining efficiency and longevity during the colder months.
This guide will take you through the critical steps you need to ensure your mini split HVAC system stays in optimal condition during winter.
What is a Mini Split HVAC System?
A mini split HVAC system is a type of zoning system that allows for precise temperature control in different areas of your home.
Key components include:
- An indoor unit that handles air distribution
- An outdoor unit responsible for heat exchange
- Refrigerant lines that connect the two units
These systems are energy-efficient and provide excellent heating and cooling capabilities, making them a popular choice for residential spaces.
Why is Winterization Necessary?
Learning how to winterize a mini split is crucial for several reasons:
- Prevent Damage: Prolonged exposure to cold weather can lead to freezing, which can damage components and lead to costly repairs.
- Maintain Efficiency: A proper winterization process ensures the system operates efficiently, saving on energy bills.
- Longevity: Taking these steps can extend the life of your mini split system, giving you more value over time.
How Do You Begin Winterization?
What Steps Should Be Taken to Winterize Your Mini Split?
When figuring out how to winterize mini split systems, follow these steps:
-
Turn Off the System:
– Before starting the winterization process, turn off the system at the thermostat.
– Then, turn off the power at the breaker to avoid any accidents. -
Clean the Outdoor Unit:
– Remove any debris, such as branches, leaves, or dirt, from around the outdoor unit.
– Use a soft brush or vacuum to clean the coil gently.
– Make sure the drainage holes are also clear to prevent blockage. -
Check for Refrigerant Leaks:
– Inspect the lines and connections for any signs of leaks.
– If any leaks are found, contact a professional technician for repair. -
Disconnect the Power Supply:
– As an extra safety measure during winter, consider disconnecting the power supply to the outdoor unit. -
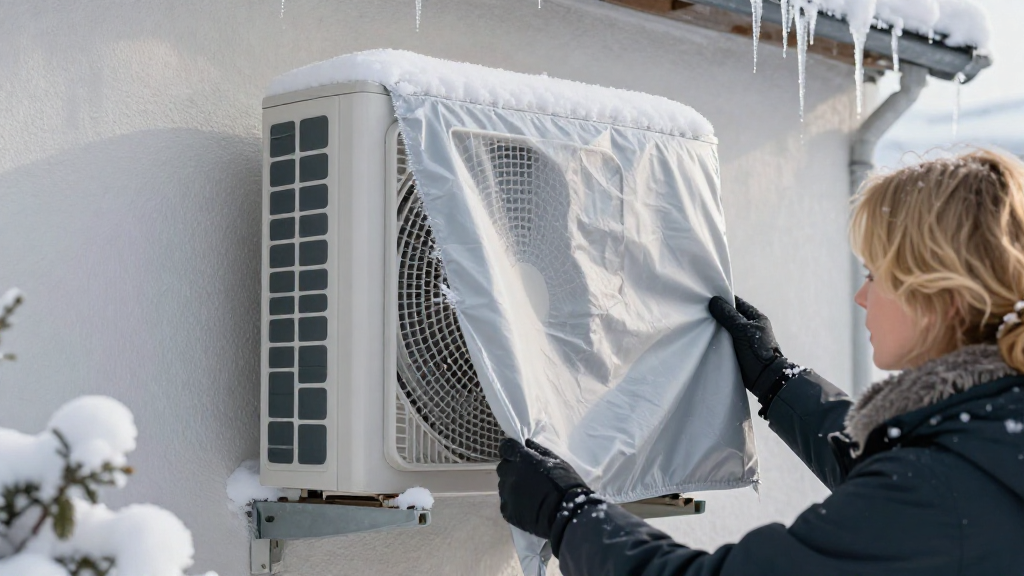
Cover the Outdoor Unit:
– Use a weather-resistant cover to protect the outdoor unit from snow and ice.
– Ensure that the cover allows for ventilation to prevent moisture buildup. -
Flush and Drain the Drain Line:
– To ensure that water does not freeze and block the drainage line, flush it with warm water.
– Make sure that it flows freely to the ground. -
Set the Thermostat:
– Adjust your thermostat settings to a low heat setting to keep the indoor unit functioning.
– This is especially important if you have a heat pump, as it will help maintain ambient temperature.
What Maintenance Should Be Done Before Winter?
Are There Routine Checks to Perform?
In addition to the winterization steps, consider conducting routine checks to ensure peak performance:
- Check Filters: Clean or replace filters to optimize air flow.
- Inspect Indoor Units: Look for any blockages in the indoor unit and clean it thoroughly.
- Assess Wiring and Connections: Inspect electrical connections and wiring for any signs of wear or damage.
How Do You Know if Your System is Ready for Winter?
After completing the winterization steps, check the following:
- Proper Airflow: Ensure that your indoor unit is distributing air properly.
- Temperature Regulation: Confirm that the thermostat settings are functioning as expected.
- No Unusual Noises: Monitor for any unusual sounds during operation, indicating potential problems.
Should You Call a Professional for Winterization?
When is Professional Help Needed?
While many homeowners can successfully learn how to winterize a mini split, some situations may necessitate the assistance of a professional:
- Refrigerant Issues: If you suspect your system has a refrigerant leak or requires recharging, it’s best to call a licensed technician.
- Electrical Problems: Any signs of electrical issues should be handled by a qualified professional to ensure safety.
- Complex Systems: If your mini split system is part of a more extensive HVAC setup, professional guidance may be beneficial.
What to Do During Winter?
How Should You Monitor Your System Throughout Winter?
Once you’ve winterized your mini split system, keep the following points in mind:
- Check the Outdoor Unit: Regularly inspect the outdoor unit during winter for snow accumulation or ice build-up.
- Clear Away Snow and Ice: Safely remove any snow or ice that may accumulate around the unit.
- Monitor Performance: Pay attention to how well the system is heating your space and look out for any unusual sounds or smells.
Conclusion: How to Winterize Your Mini Split HVAC System
Winterizing your mini split HVAC system is essential for protecting your investment and ensuring that it operates efficiently throughout the colder months.
By understanding how to winterize a mini split, you can take necessary preventive measures:
- Clean the outdoor unit
- Check for leaks
- Drain the drainage line
- Cover the unit
By following these simple steps and performing regular maintenance, you’re ensuring that your mini split system will be ready to provide maximum comfort, no matter the season.
Taking the time to winterize now will save you hassle and reduce costs down the line, giving you peace of mind when the snow begins to fall.